Anaconda Python distribution#
Platforms: MacOS X, Linux, and Windows
We recommend using the Anaconda Python distribution from Continuum Analytics (or the related Miniconda distribution). Anaconda includes all of Glue’s main dependencies. There are two ways of installing Glue with the Anaconda Python Distribution: graphically using the Anaconda Navigator, or using the conda command on the command-line, both of which are described below.
Command-line installation#
Once Anaconda (or Miniconda) is installed, we recommend installing glue using
the conda command on the command-line rather than using the
Graphical User Interface, because errors are more visible on the command-line if you
run into any issues during the installation.
First, make sure that your conda command is up to date:
conda update -n root conda
then install glue with:
conda install -c glueviz glueviz=1.2
This will install the latest version of glue from the glueviz conda channel.
If you run into any issues, even after having updated conda, see the
Troubleshooting section below. To update glue in future, use the same install
command as above.
Graphical User Interface#
If you prefer to not use the command-line to install glue, you can also use the Anaconda navigator, but be aware that it is harder to diagnose issues when things go wrong (the navigator can sometimes silently fail). Once Anaconda is installed, go to the Applications folder and launch the Anaconda Navigator:
If you do not have the Anaconda Navigator icon, but have an Anaconda Launcher, you are using an old version of Anaconda, and we recommend that you update to the latest version.
Assuming you have the navigator open, before installing glue first click on the Channels button:

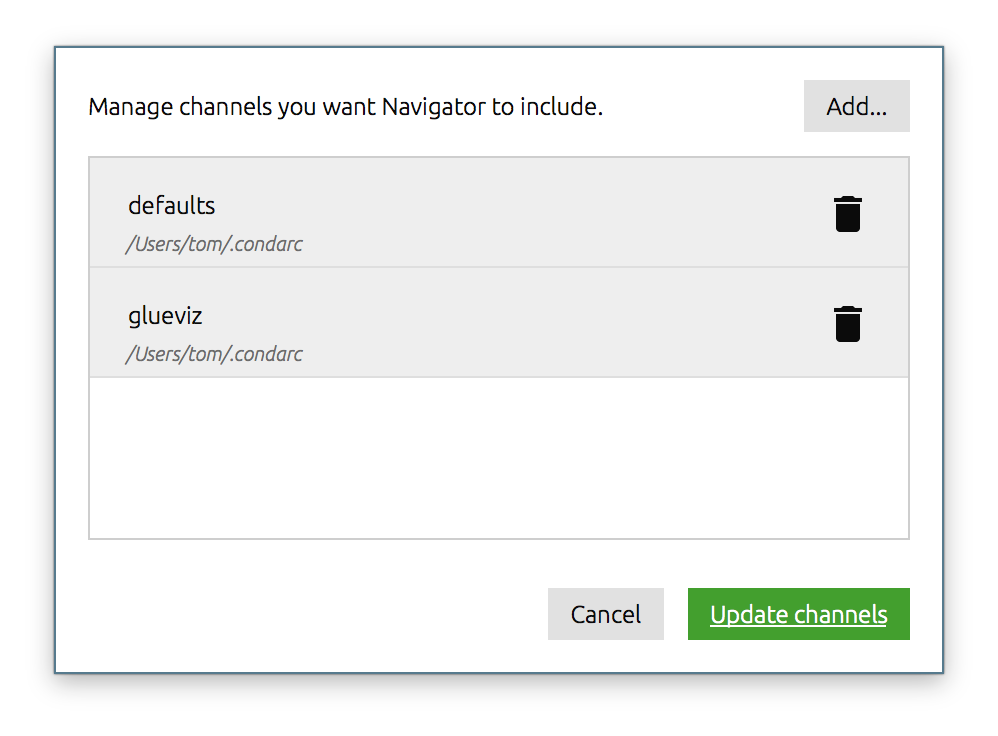
If not already present, add glueviz to the list of channels by clicking on Add, typing glueviz, and pressing enter, then click on Update channels:

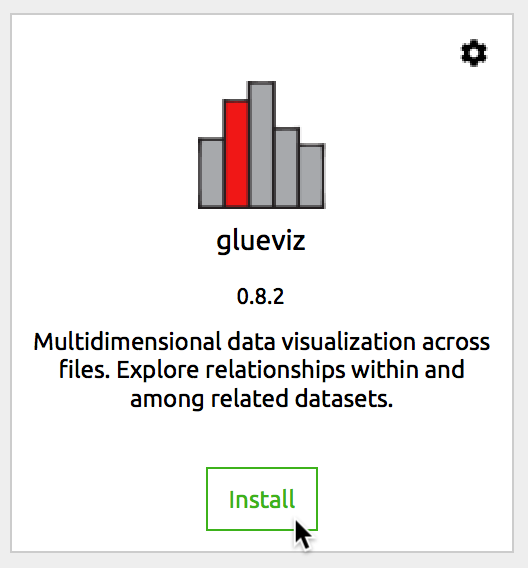
You can now install the latest version of glue by clicking on Install:

Once the installation is complete, you can click on the Launch button (which will replace the Install button). If updates become available in future, these should be shown in the Navigator.
Troubleshooting#
If you managed to install glue but it does not launch or you have issues with viewers not being available or not working correctly, the first thing to try is to update all your existing conda packages using:
conda update -c glueviz --all
In some cases, glue won’t even install due to conflicts between the version of dependencies required by glue and that required by other packages. The easiest way to avoid this is to install glue in a separate environment. To do this, first create an environment in which you will install glue:
conda create -n glueviz-env python
This will create an environment called glueviz in which Python will be
installed. You only need to create the environment once. Once created, you can
switch to the environment with:
source activate glueviz-env
Then, install glue as indicated in Command-line installation using:
conda install -c glueviz glueviz
Whenever you open a new terminal, if you want to run glue you should then
remember to switch to the glueviz-env environment using the source
activate command above. If you want to update glue, run the installation
command again inside the environment.
